I’m addicted to the smart home, but have struggled for years to find a solution for our heater in San Francisco, USA. Nest wouldn’t work. Here’s how I resolved it.
My thermostat is old and analog. I wish I had a Nest
I live in an old house, built in the 1950’s. But I’m making it smart. The first step was Alexa, with TP-Link smart bulbs and Sonos. Then I integrated my rooftop solar system with Messenger.
Now that Winter Is Coming, it’s time to focus on heating: pre-heating the house before we get home from work, and again before we get out of bed in the morning.
But the Nest won’t work with my furnace
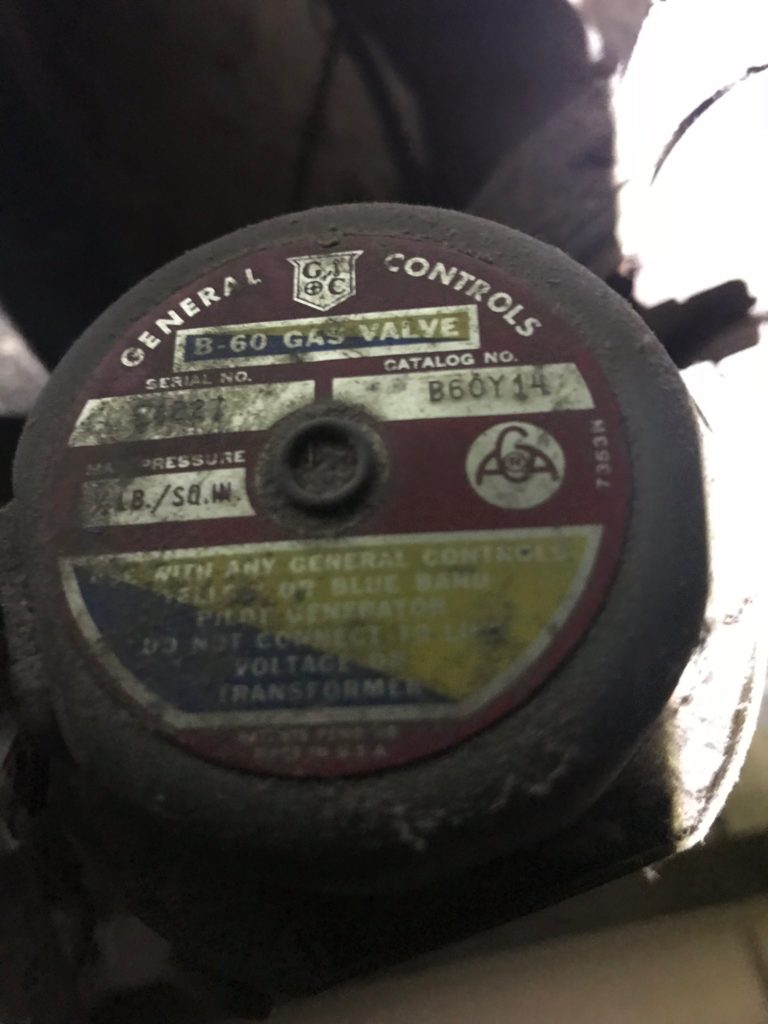
I’ve had my eye on a Nest Thermostat for a long time. But the one type of heater that doesn’t work with Nest is the one we have: Millivolt. Unlike the other 99% of people with furnaces in the US, we lack a C-wire since we don’t have a 24 Volt system.
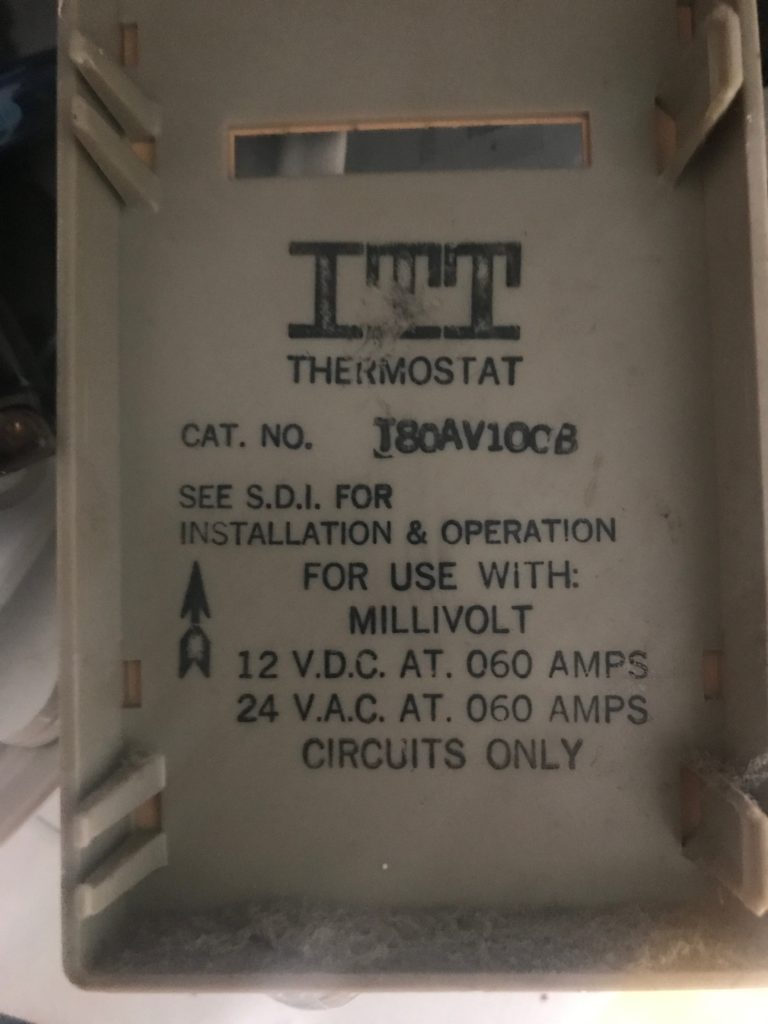
That’s been the standard for decades and what Nest is built on. Millivolt is a century-old off-the-grid method of heating that runs off a 0.5mV closed circuit. This is awesome if the power goes out but not otherwise.
But Nest UK can be hacked to work in San Francisco!
Not satisfied with this situation, I did a ton of research and found this post by a fellow San Franciscan. He hacked together a transformer and relay to control his similarly ancient furnace with a Nest. As I was about to purchase the same electronics from Amazon, I noticed a comment that mentions the UK version is different and works with Millivolt systems. Whoa. The hypothesis is that heaters (boilers) in the UK / EU mostly run via a simple on-off switch. This is similar to Millivolt. Just closing the circuit makes the heat go. Opening the circuit cuts the heat.
I’ll try Nest UK
I looked at several products from the UK that all claim to work with “dry contact” / Millivolt systems:** Tado, Nest, and Netatmo. **Tado had great reviews but I went with the Nest because it was a little less complicated. Tado requires an Extension kit. Netatmo looks great with its Starck design, but had poor reviews.
But I still had all these questions about the Nest 3rd gen from Amazon.co.uk…
- Would it work with my 110V power outlets? Or would I need a 230V transformer?
- Would there be some regionalization like DVD’s that prevented international usage?
- Nothing surface about working with Millivolt systems in any documentation… should I trust this random commenter?
- Could I return this to Amazon UK if it didn’t work?
It arrived a week later and I unboxed.
First step was to pair the Heat Link (controller for the heater) with the Thermostat. The big benefit of this setup is that the Heat Link attaches to the furnace which is often in the basement or garage. Heat Link takes orders wirelessly from the thermostat (there’s also a way to wire them if the wireless signal is weak). The thermostat isn’t wired into the Heating system. It just needs USB power and can sit wherever – bedside, on the living room wall! It doesn’t need to go in the same spot as your old thermostat like Nest US does! Who knew a Thermostat didn’t have to be wall-mounted?
Why Didn’t USB power work On Heat Link?
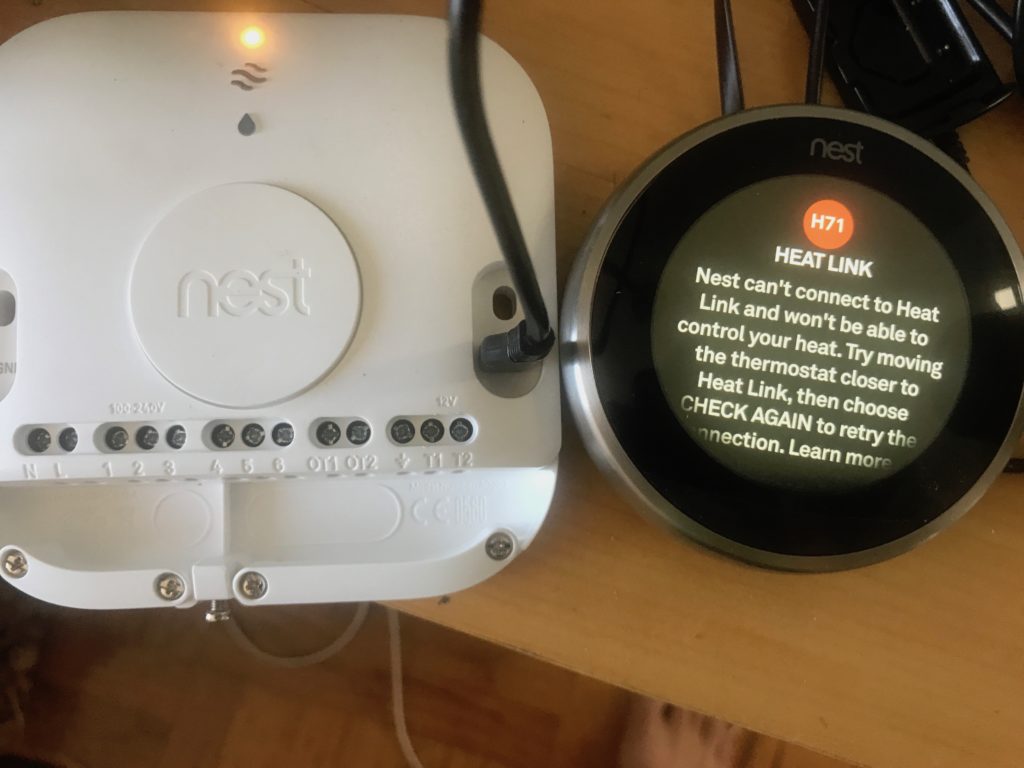
I USB powered the Heat Link (yes, there’s a microUSB port!). And it didn’t do anything. The instructions say to connect it to the live main power at 230V, which is supplied by all modern UK furnaces. I don’t have 230V but I definitely have USB. The Nest documentation, website, and support had no info on the Heat Link’s USB port. Trying chat support, I kept getting directed to US support who didn’t know anything about the Heat Link since it shouldn’t exist in the US. I even posted on Reddit.
Switching to AC power
My last hope before returning was to try AC power to the Nest instead of the clean and safe USB option (isn’t everything USB powered now??). The nest manual suggests a 100-230V range in some places but 230V in other places. I figured I could try 110V and there’d be a 50/50 shot at frying the Heat Link. I stripped some 18 gauge wire, jammed it into an old surge protector, connected it to the L and N leads on the Nest. It booted up and paired with the Thermostat within a minute. Boom. I’m in business.
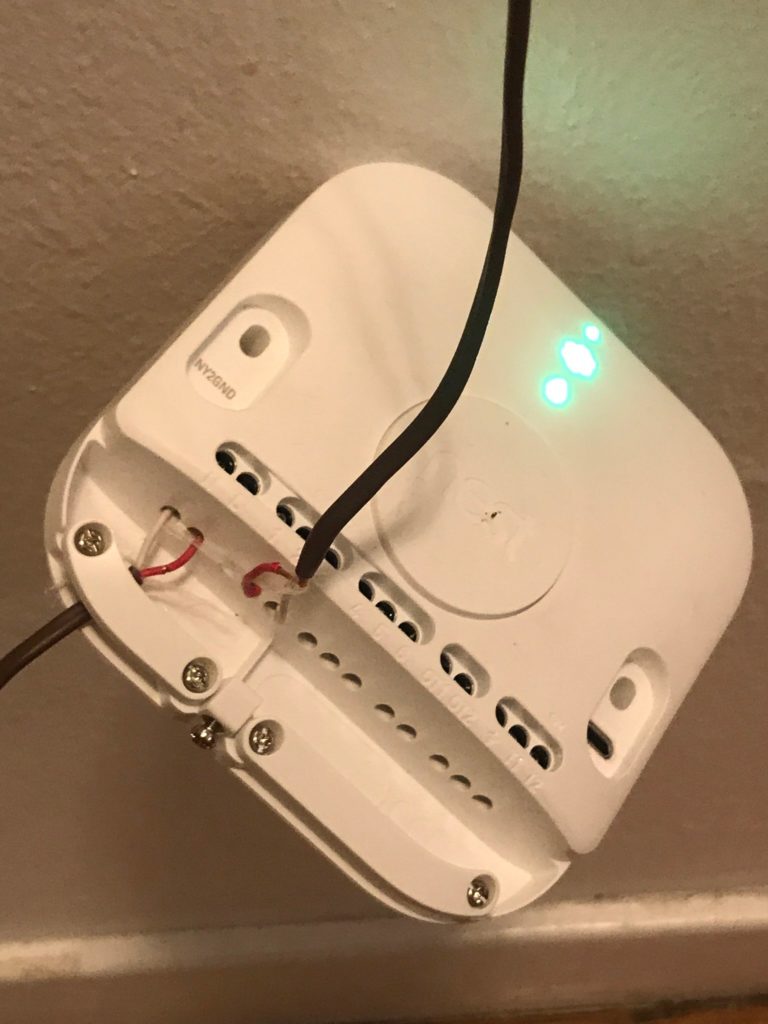
Next step was to see if the Heat Link could actually control the furnace. I have no experience with HVAC or thermostats and only some electrical engineering from college 15 years ago. So I connected a pair of wires to the Nest where the manual suggest it worked with “dry contact” systems. I couldn’t confirm from the internet that Dry Contact is equivalent to Millivolt, but both definitions seemed similar – no exogenous power source.
Rigging it up and testing
Before going down to the furnace and crawling around to wire up the Heat Link, I rigged it up to the Thermostat since those wires go straight to the thermostat. The Heat Link was still powered by the rigged up surge protector and was ready to roll. I hit the manual override button and the heater kicked in immediately. Success!! I verified that the thermostat was connected and recognized the manual override. Yup, it did. We’re in business!
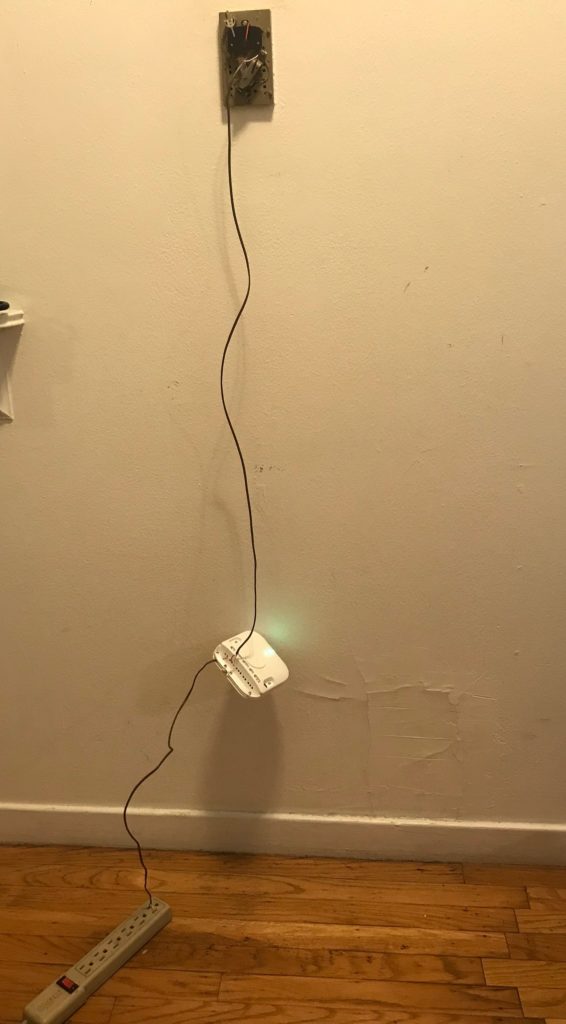
I then headed down to the furnace and wired up the Heat Link to the leads on the crusty old gas valve. The thermostat is sitting pretty in our living room, connected to the cloud via wifi and the Heat Link by its own protocol. I’m hoping that we’re not only more comfortable this winter but also more energy efficient.
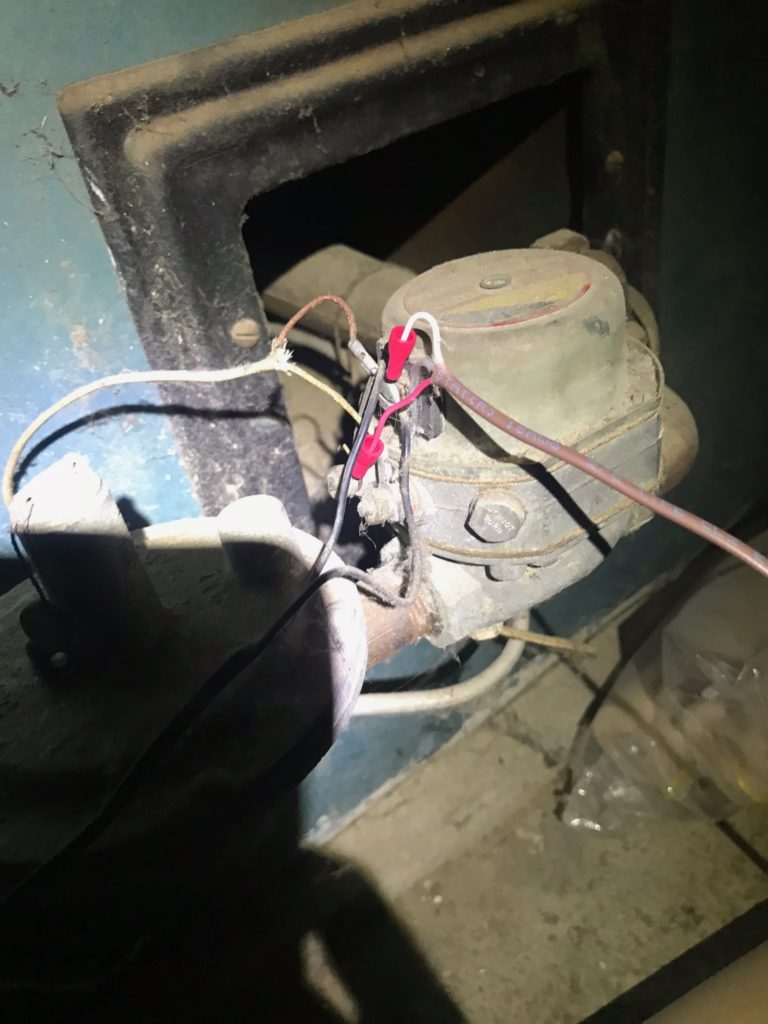
I’m excited to see how this works and excited to be a Nest customer. I haven’t had to import a foreign item before as globalization has made technology so similar everywhere. But 100-year old heating technology wasn’t nearly globalized. So importing did the trick. Now it’s rigged up with Alexa, IFTTT, and Google Home!
In case you want to try this too
What you need to control a dry contact / Millivolt furnace with Nest:
- A Millivolt furnace
- Nest UK 3rd gen
- A “lamp cord” to power the Heat Link (you need a power source near the Heat Link). And old AC cord will work (two wires, not three; no ground needed).
- 18+ gauge wire to connect the Heat Link to the gas control valve on the furnace
- USB power for the Heat Link
- Wire strippers
Instructions
- Connect the lamp cord to L and N on the Heat Link
- Connect 2 and 3 to the two contacts on the furnace gas valve
- Plug Heat Link in
- Test that manual operation (hitting the big round button) turns the furnace on and off
- Attach Nest backplate to Nest
- Power Nest via USB
- Go through setup and confirm sync with Heat Link
- Try controlling your furnace wirelessly via Nest!

